Last week I introduced WooWednesday, but I didn’t really get into any details about the plugin itself or getting started setting up a store. This week, it’s time to remedy that!
While this won’t be a comprehensive walkthrough of everything you can do when setting up a store, you’ll still be able to sell products by the end of it anyway. Let’s not waste any time!
Prerequisites
We’ll want to get a couple of prerequisites out of the way here. First, you need to have a WordPress site hosted somewhere – either online or on your computer locally. WooCommerce is a WordPress plugin, so a WordPress site is a must. This overview assumes that you have a WordPress site and a working knowledge of WordPress.
Secondly, you’ll need the WooCommerce plugin installed and a theme. If you don’t have a theme chosen already, I’d recommend using the Storefront theme to start. It’s made by the people behind WooCommerce and is very clean and minimalist. It’s also what I’ll be using below as we walk through this process.
The WooCommerce Setup Wizard
When you install and activate the WooCommerce plugin, it will automatically take you through a setup wizard. Let’s take a look at each screen here and decide what the right settings should be.
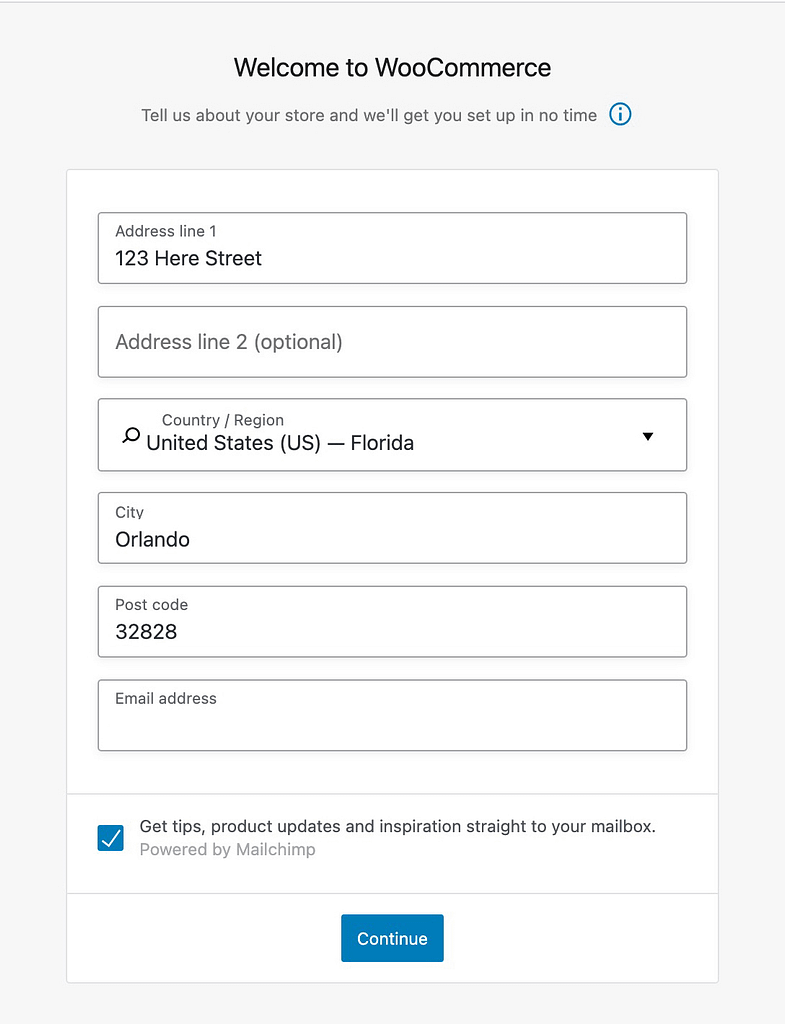
Store Details
Be sure to complete the store details as accurately as possible. It might be tempting to fill in bogus details (like I’ve done here 🤦♂️), but these details will be important when it comes time to set up accurate shipping and tax information.
Make sure you put in your real store details!
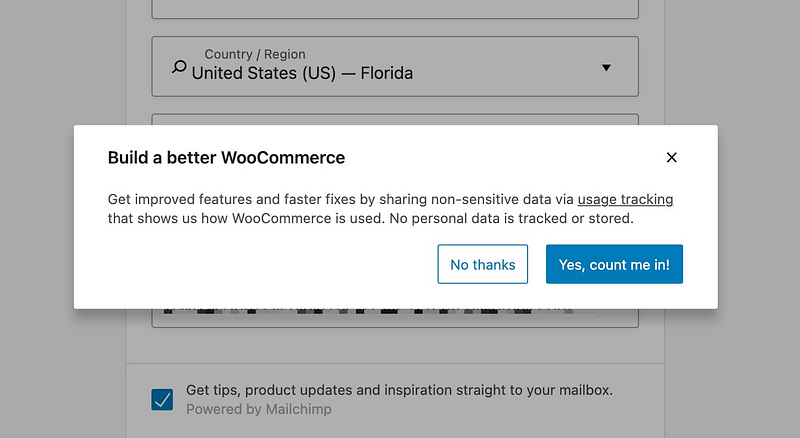
WooCommerce Usage Tracking
Since WooCommerce does not collect any personal data, I’ll leave this choice up to you. If you’d like to allow WooCommerce to see aggregated usage data, feel free to agree. Otherwise, hit that “No thanks” button.

Store Industry
WooCommerce uses this information to set some defaults for you and recommend themes, so go ahead and choose an industry for your store.
What you choose here isn’t super important, but go ahead and try to get close anyway.

Type of Products
Again, not super important what you choose here, as you’ll have the ability to add whatever kind of products you want either way.
If you are setting up a membership site or a way for clients to book your services, you can sign up for that here, but that’s outside of what’s covered in this tutorial.

Business Details
There’s a pattern emerging here, as your settings on this screen also will not affect the ability to set up what you’d like on your store. Answer what you’d like here. 😄

Free features
These “free” features can be easily added at this step, but beware that some of these require other fees once the free plugin has been installed.
I encourage you to explore these options to see if there are any you’d want to leverage, but I’d leave them all unchecked for now.

Theme Selection
At last, we’ve made it to the final step! There are a lot of great free and paid theme options here, so take a look at what’s available and feel free to try a few out.
As mentioned before, I’ll be sticking to the Storefront theme for this article.
Time to Add Products
Now that your store is finally configured, you can add a product or two. There are several types of products that you can add, but I’m going to stick to the “Simple Product” type here. Start by adding a new product from the admin bar or from the sidebar in the administrative backend.

This will open a page where you can fill out the details of your product. You can complete as much or as little as you’d like, but you have to include a title and a price for the product to show up on your site’s “Shop” page.

Once you’ve added all the details you’d like to add (the more the better!), go ahead and hit that “Publish” button on the right side to save that product.
In future articles, I’ll walk through more of the possible options on this page. In the interest of time, however, I’ll let you explore the other product settings if you’d like.
Repeat this process for as many products as you want to sell and then we’ll move on to shipping and taxes.
Shipping and Taxes
Shipping and tax settings are an entire topic of their own, but let’s look at a couple of quick settings that we can set up.
Dynamic, Flat fee, and Free Shipping
The first thing you need to decide is how you want to handle your shipping costs. Do you want to charge based on the size and weight of the products? If so, you’ll want to connect your site to a shipping carrier to determine these prices. The WooCommerce Shipping & Tax plugin can help here, though many other carriers have their own plugins.
Flat fee shipping can be configured without the need for another plugin. I could reinvent the wheel here, but the WooCommerce documentation has pretty good setup instructions for this.
In fact, free shipping is also handled natively in WooCommerce and there are great instructions for that as well.
Tax Handling
If there’s any part of your site that I would highly recommend you let a service handle, it’s this one. Taxes can be super complicated and are extremely important. There are many plugins and services that can help here and, since you likely already have the WooCommerce Shipping & Tax plugin installed, I say just roll with that and enable automated taxes.

If you need more robust tax features, check out WooCommerce AvaTax.
Payment Options
A store isn’t a store without a way to accept payment, right? There are options for you to be able to collect payment at the time of pickup, but you probably want to collect payment right on the site.
To accept payment at your WooCommerce site, you’ll need to connect to a payment gateway using a plugin. I’d recommend setting up at least two payment options—one for accepting credit/debit cards and also something like PayPal for customers who don’t want to (or can’t) use a credit/debit card.
I’ll admit that I’m biased in recommending that you use GoDaddy Payments, but I genuinely do believe it’s the best and cheapest option for accepting credit card payments. That said, you might also consider WooCommerce Payments or Braintree Payments as potential alternatives.

Each gateway plugin has its own instructions for setting them up, so I’ll defer to the documentation for the one you choose for more connection details.
Confirmation Emails
By default, WooCommerce has a handful of emails that are enabled to notify you and your customers about changes to orders and their statuses.

It’s important to make sure that these are configured to say what you want them to say, so go through each one to take a look.
Additionally, you should test them to ensure that they are delivered as expected. If not, you may need to employ a plugin to increase your email deliverability. I’d recommend checking out the free WP Mail SMTP plugin—which allows your site emails to be routed through a real email inbox for better reliability.
You Have a Store!
Yay! Not including the addition of all your products or signing up for a payment processor, that probably took about 30-45 minutes and now you’re ready to sell your products! That’s pretty exciting! 🎉
There are certainly many other tweaks you can make to further enhance your store, but the foundation is set. Over many WooWednesdays to come (and probably some other days in-between), I’ll dive deeper into each of these areas and ways you can take your store to the next level.


